How to fix GPU Render Error in Premiere Pro in 7 Easy Steps
Here are 7 Tricks to Fix GPU Render Error in Premiere Pro
In this post, you will learn How to fix GPU Render Error in Premiere Pro easily.
If you are facing the issue of failed to Render Frame or GPU Render Error or Error Code 1609629695, then you can try the following Tricks to fix it easily.
Watch the Video Tutorial on How to fix GPU Render Error or Failed to Compile Movie below!
The first trick to fix GPU Render Error in Premiere Pro
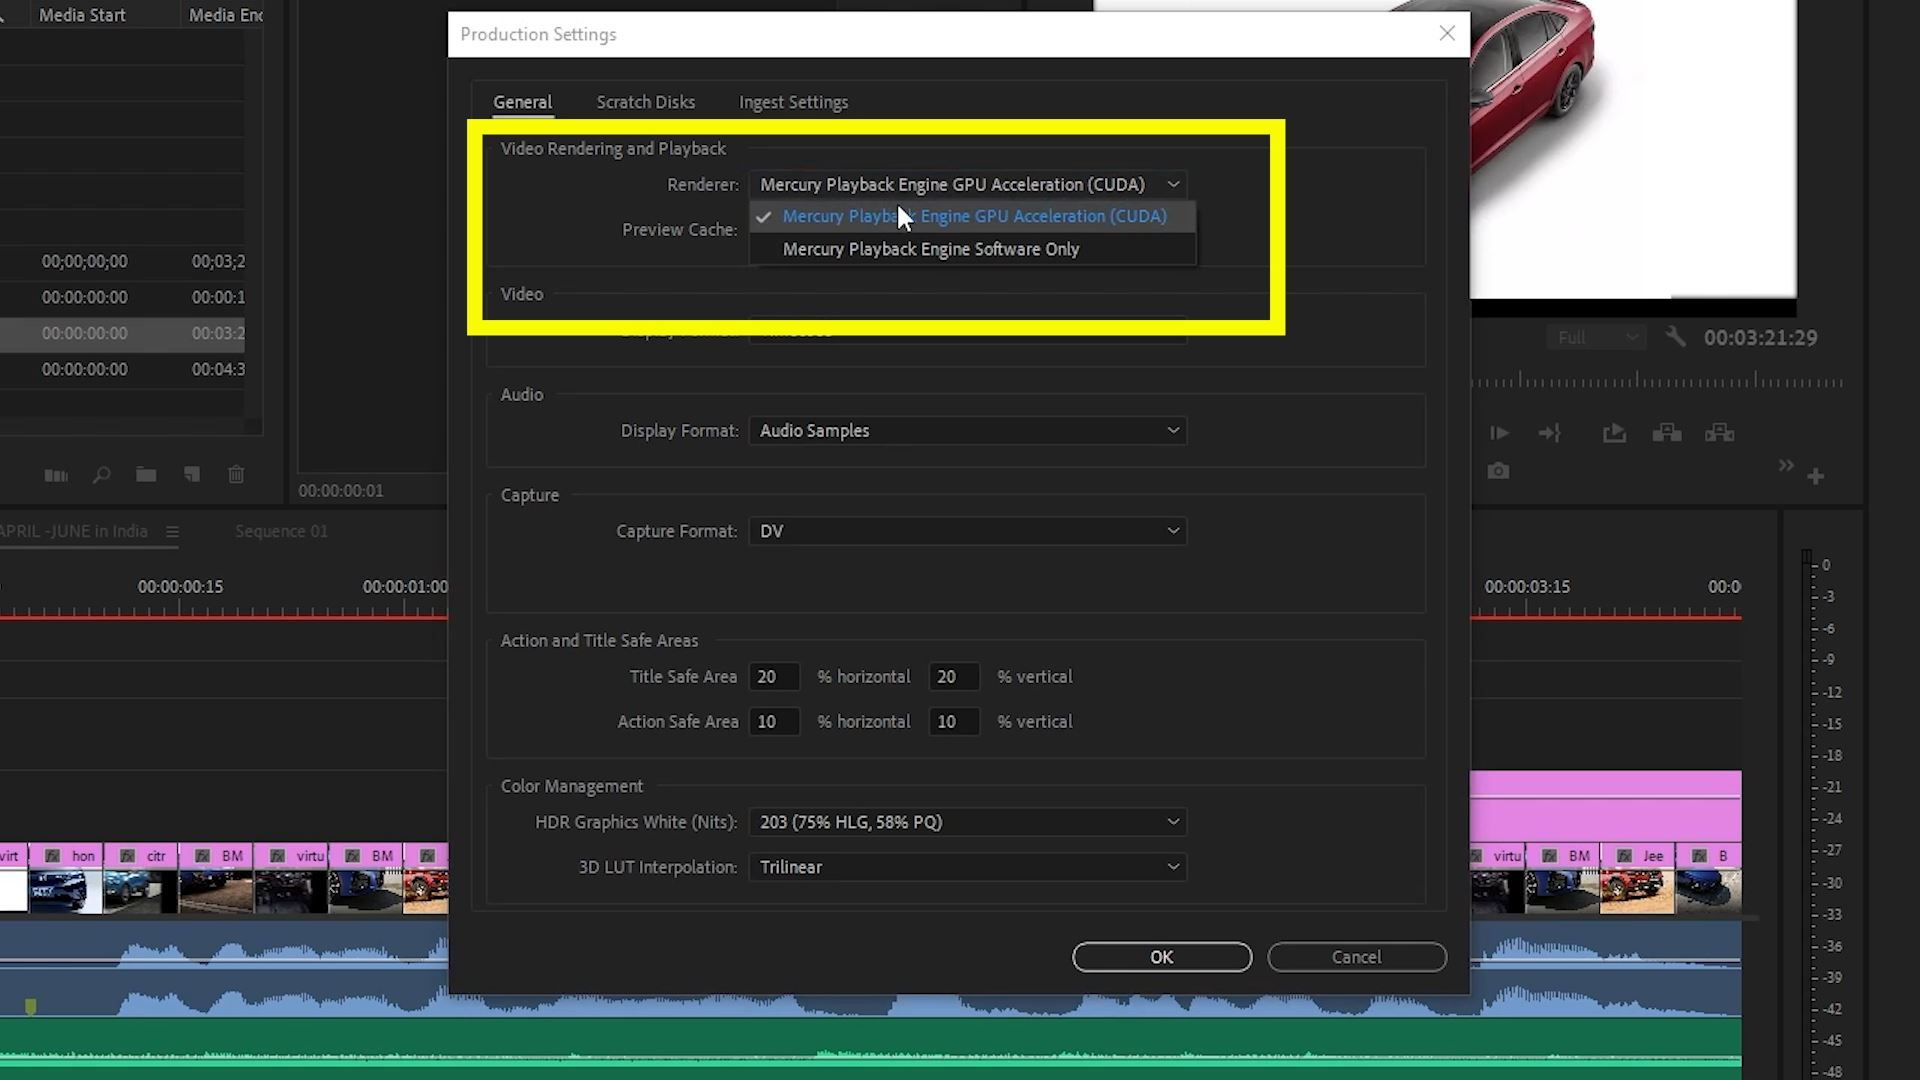
The first trick which most likely to work for everyone is changing the Project Settings from GPU Render to Software only.
 Just go to the file-Project Settings-General, or file Production-Production settings-General and under the option of video rendering and playback-click on the Renderer and change Mercury playback Engine GPU Acceleration CUDA to Mercury playback engine Software only or vice versa.
Then press Ok.
And now try to export, it is most likely to work now but if still not try restarting the Premiere Pro or you Pc.
But if this problem is still not fixed then try the next trick.
Read this also:- How to Fix Offline Media Detected Error in Adobe Media Encoder 2021
The Second Trick to fix GPU Render Error in Premiere Pro
In the second trick we have to create a new sequence and then drag and drop the previous sequence in the timeline of the newly created sequence. Now try Exporting, this might work now. But if it still does not work, then try the next trick.
The Third Trick to fix GPU Render Error in Premiere Pro
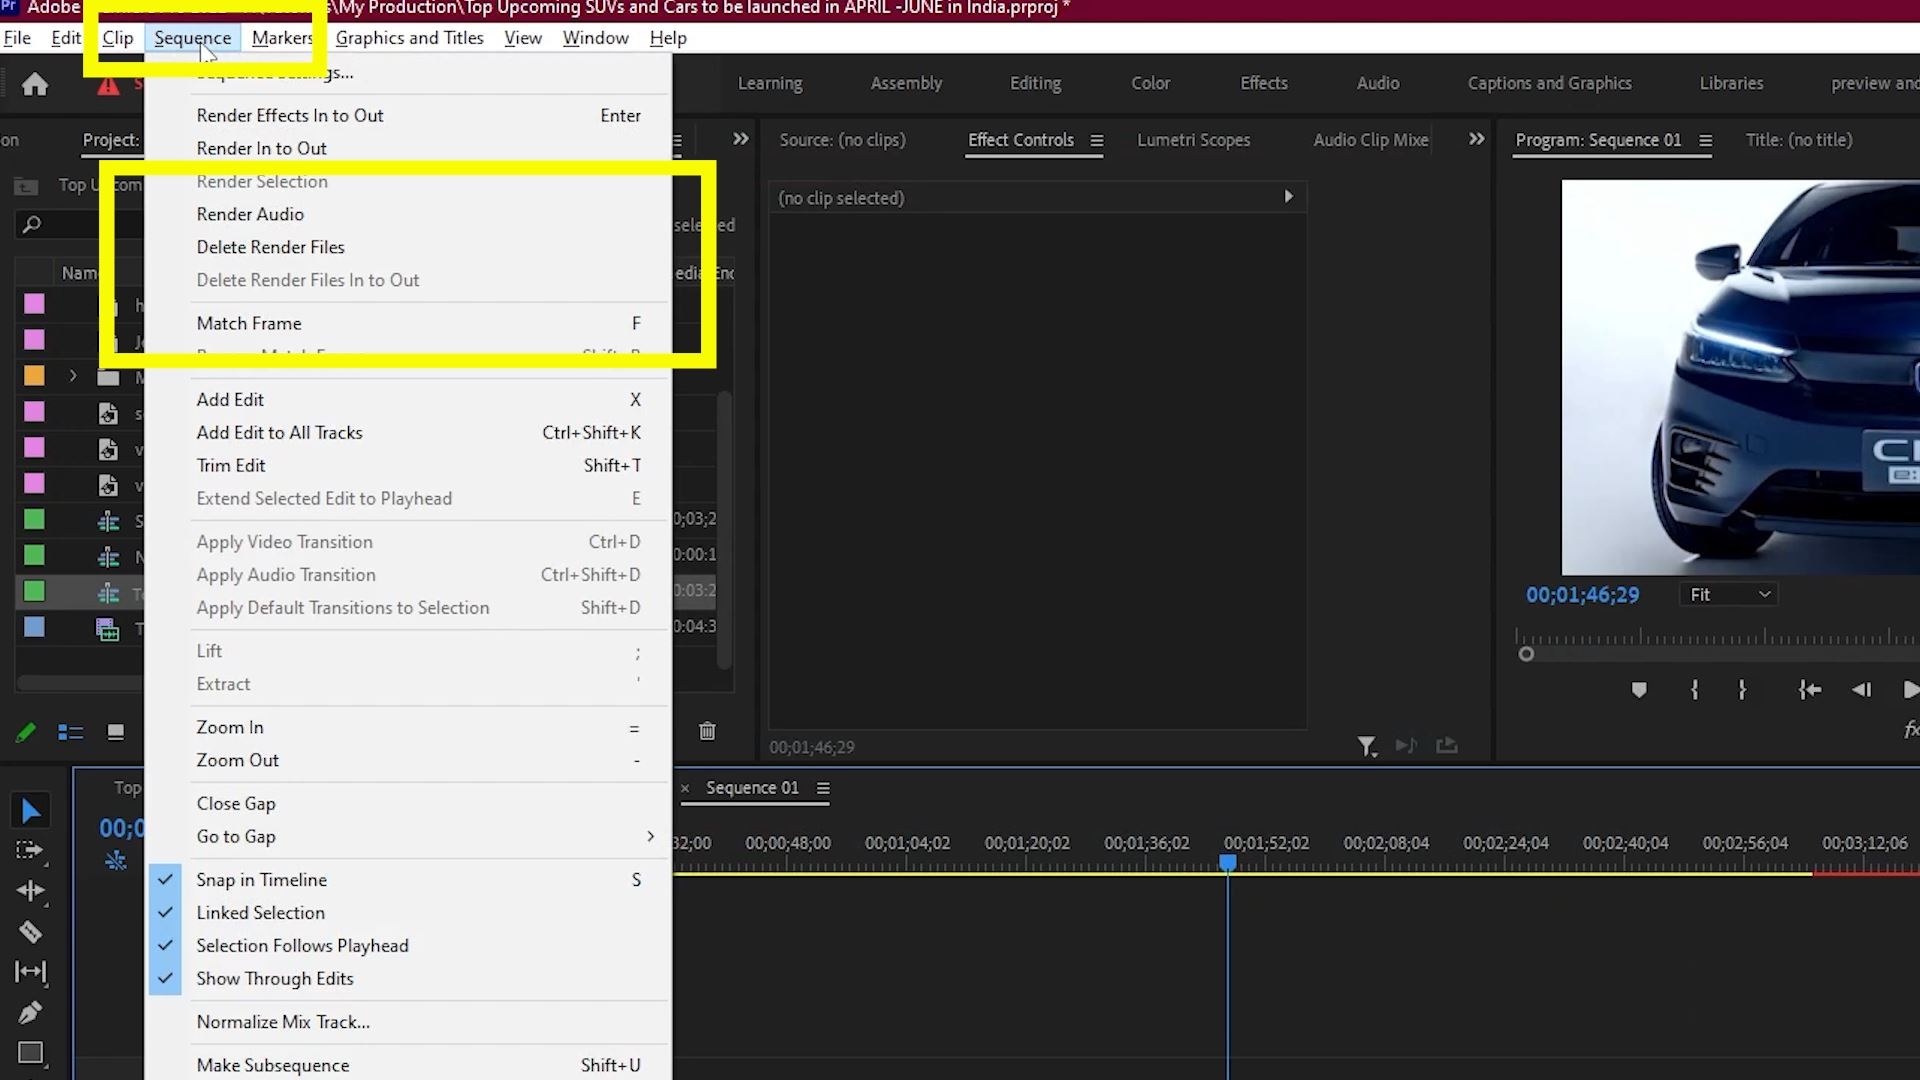
The third trick is to delete render files. For this purpose just go to Sequence and select Delete Rendered files. Now try exporting again. If it is still not solved then try the next trick.
 The Fourth Trick to fix GPU Render Error in Premiere Pro
The fourth Trick is fixing a bad clip. Just notice the place where your rendering failed then find that on the timeline. This mostly happens with still images be it jpg or png. Just replace them with a new format or try to reconvert them to the same format using Photoshop or an online tool.
But this kind of problem is caused by the online conversion tool so I would suggest using Photoshop or any other image editing software for conversion.
This should be done for the video clip as well.
Sometimes this is caused by the Text layer or the Mogrt Template. Try removing them or replacing them and see if it exports properly. If the problem still persists then try the next trick.
Read this also:- Best Seamless Transitions Pack Premiere Pro-Lifetime Deal
Fifth Trick to fix GPU Render Error in Premiere Pro
Trick five, change the power settings and auto-lock settings on the windows machine.
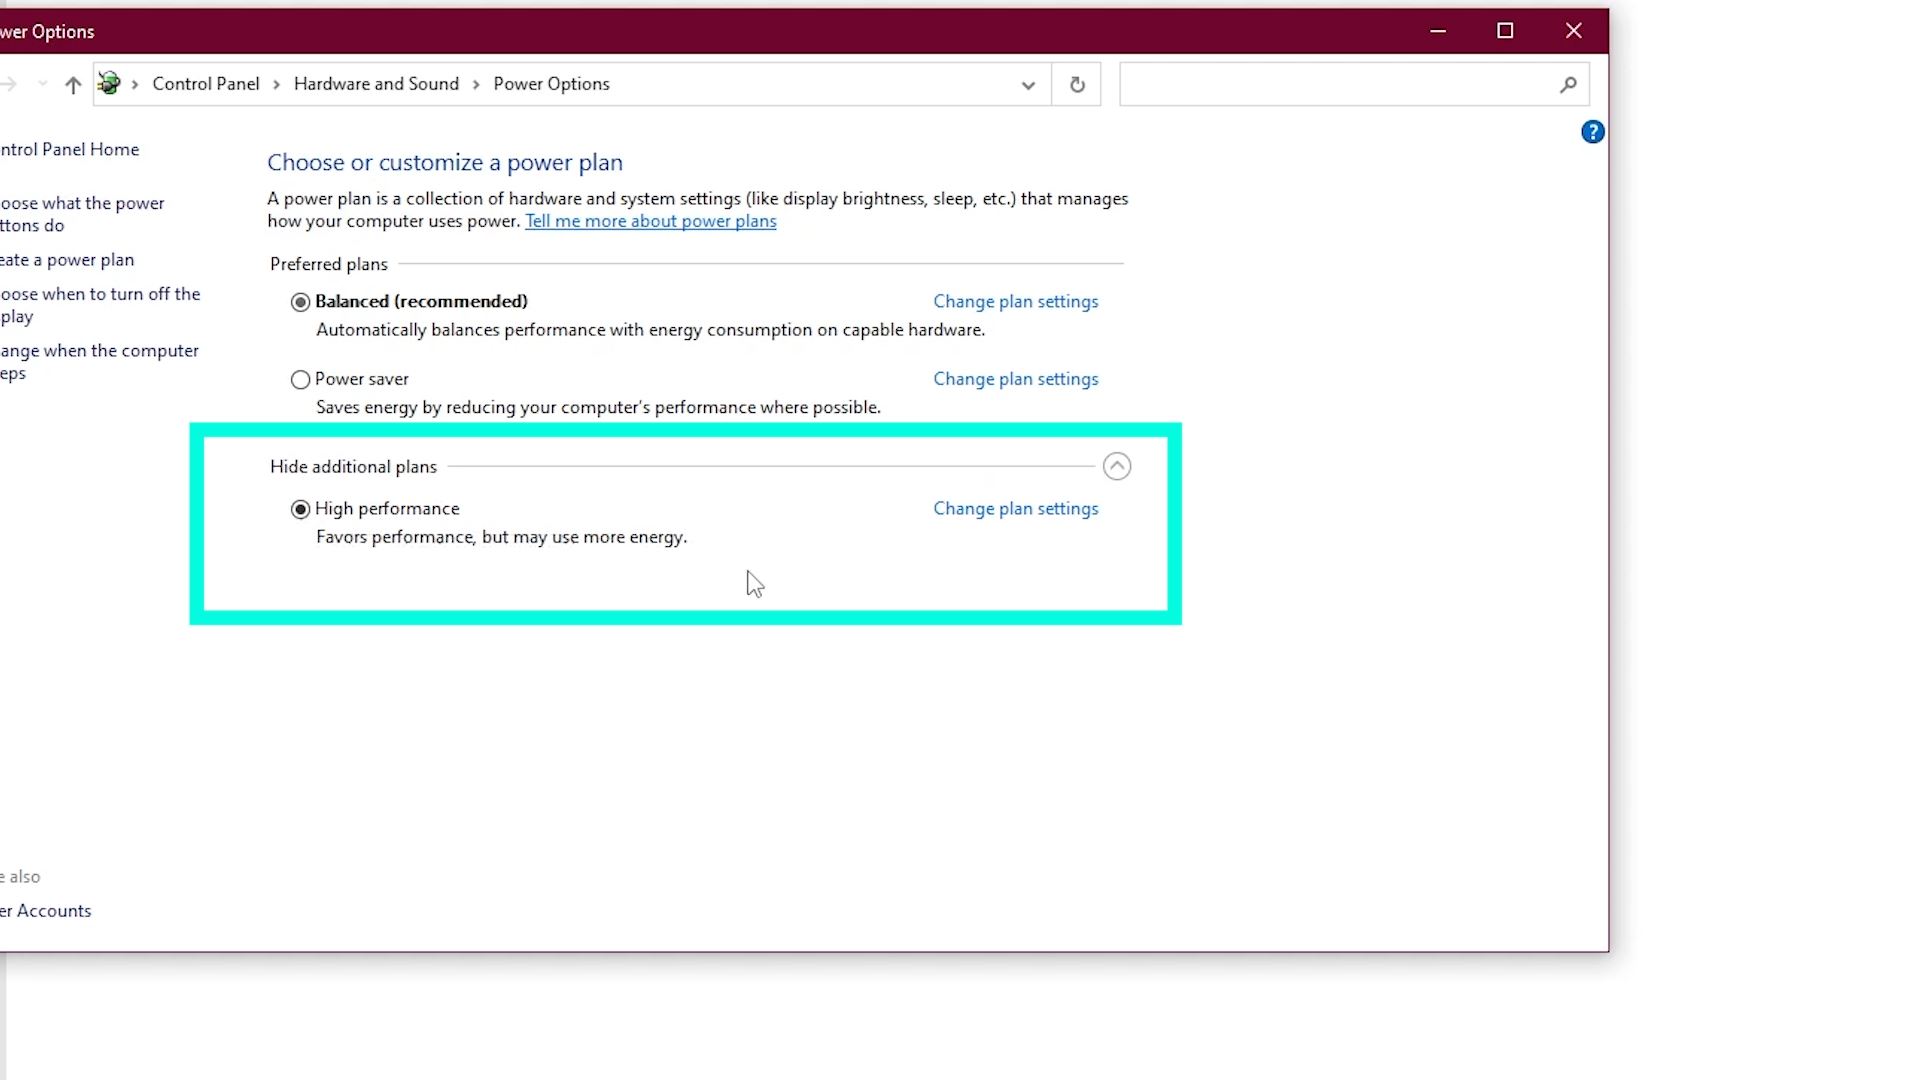
Just search power and sleep settings in the windows search bar and change the sleep setting to Never.
On the right-hand corner click on the Additional Power Settings. Here Balanced Recommended must have been active for you.
Just click on the little arrow after the Show Additional Plans.
 You will see High Performance just click on it and activate it.
Try exporting now and see if it is fixed.
I hope this might work for you now otherwise try the next trick.
Read this also:- 1600+Hollywood Cinematic LUTs Pack-Get Amazing Film Look-Lifetime Deal
Sixth Trick to fix GPU Render Error in Premiere Pro
For the last trick try updating your graphics driver to the latest version or if you have installed Game Ready Drivers, try installing Studio Drivers for the NVIDIA graphics card.
Just go to the NVIDIA GeForce Experience and click on the Drivers Tab. After Check Updates you will see 3 dots click. If you see Game Ready Driver installed then choose Studio Drivers or Game Drivers if Studio Drivers is selected.
Try exporting now.
Read this also:- Premiere Pro Template-Top 10 Amazing Opener Templates-Premiere Pro-Videohive
Seventh Trick to fix GPU Render Error in Premiere Pro
Lastly, try updating your Premier Pro to the latest version or if you have recently updated to the latest version then downgrade to the previous version.
I hope one of these tricks will work for you! If it helped please like the video and share it with others to help them out.
Thank you for reading!

 The Fourth Trick to fix GPU Render Error in Premiere Pro


